


In Part I of this series, we saw how to create granular permissions and custom roles in HarperDB. In this article, we’ll take a step further and leverage a third-party identity engine to pass authorization scopes to HarperDB.
For this, we’ll use Okta Customer Identity Cloud and pass in a JWT with scope defined in Okta. The token will then be parsed by a validator function in Custom Functions, which will set the correct permission claims before forwarding the request. This allows us to offload the authorization management to a central engine and separate that logic from the database access layer.
HarperDB Setup
First, we need to create a local instance of HarperDB with Custom Functions enabled:
Next, we need to register the instance on HarperDB Studio. Click on “Create new HarperDB Cloud Instance” and choose “Register User-Installed Instance”. Fill out the instance details to match the environment variable we passed in the docker run command above.
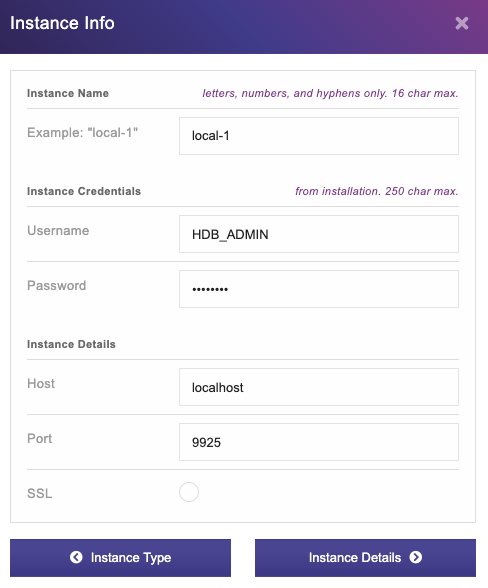
NOTE: To connect a local instance, we need to enable mixed content on our browser. Follow the instructions to enable mixed content in your browser: https://experienceleague.adobe.com/docs/target/using/experiences/vec/troubleshoot-composer/mixed-content.html.
Okta Setup
Next, we need to create an Okta account. Sign up for a free trial of Okta Customer Identity Cloud.
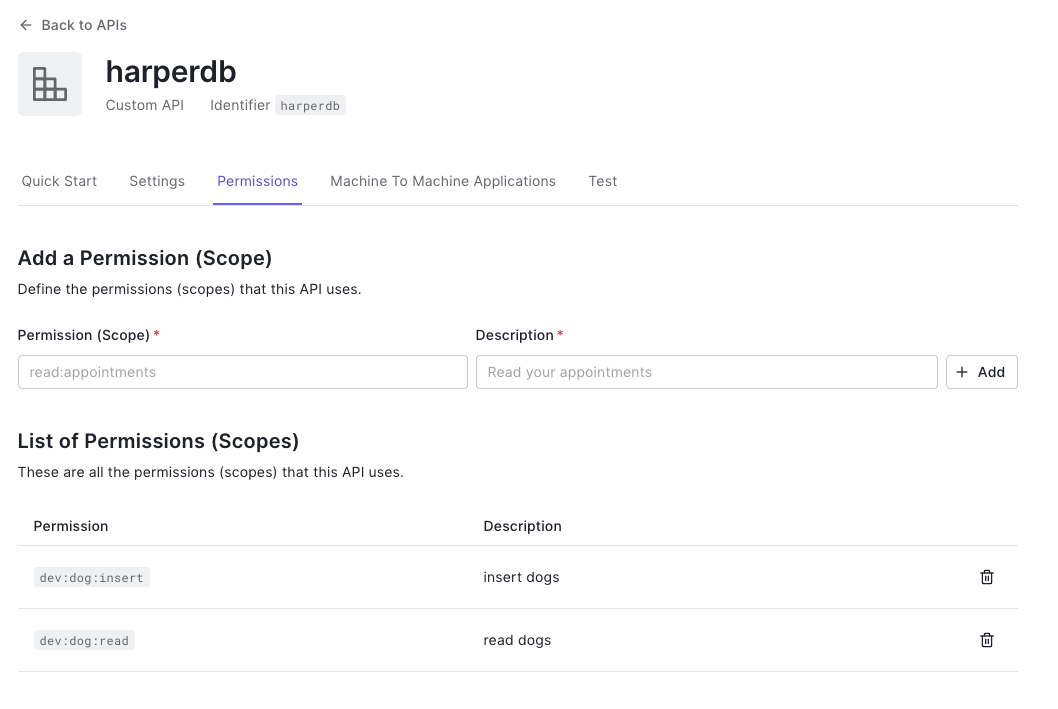
We then need to create a Custom API and set permission scopes. We will use the following convention to set scopes: <schema>:<table>:<operation>. For example, to allow read and insert access to the dev.dog table, we can define the following permissions.
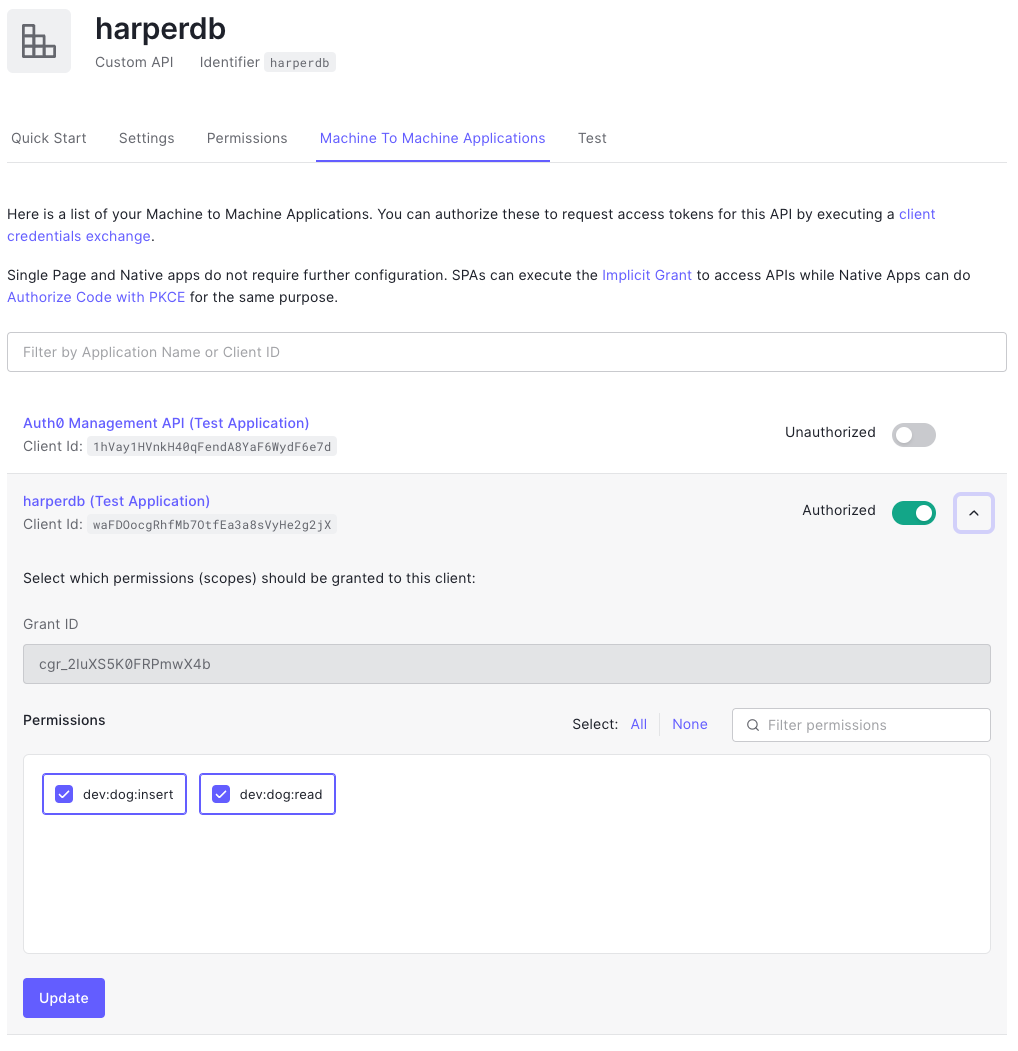
Once the permissions are set up, we can assign them to our application. Under “Machine To Machine Applications” tab, authorize our application and select the permissions we want.
Now we’re ready to grab JWT and pass it to HarperDB to parse the authorized scopes. Under the “Test” tab, try the curl command to get the “access_token”:
You should receive a response like:
The scopes are included at the top-level, but you can also double-check by decoding the bearer token on jwt.io.
Setting up HarperDB Custom Function
To deploy a HarperDB Custom Function, we need to add the function under `custom_function` endpoint where HarperDB is storing the data (e.g., `/harperdb` mounted via Docker).
Clone the `cf-auth-okta` function under `custom_functions/okta`.
This custom function creates two routes:
- Public GET endpoint to grab all records from the `dev.dog` table ordered by `dog_name`. This request does not use authentication and is here for demonstration purposes of bypassing auth.
- Post endpoint that will only authorize the insert action if the role passed via JWT from Okta has the insert permission defined.
The validator function is inside `helpers/okta.js`. Make sure to replace the OKTA_DOMAIN with your Okta domain URL.
This code first validates the JWT token from Okta using oktaJwtVerifier. It then maps the decoded Okta scopes (e.g., “dev:dog:read dev:dog:insert”) from the token into the format that HarperDB expects as we saw in Part 1.
Once this is in place, navigate to HarperDB Studio and restart the server.
Testing Our Application
We can now send some commands to test inserting records to our database. First, we can send a request with no token:
This will return a 400 response with the message: “Unauthorized: need bearer token”
When we pass in our bearer token from Okta, we can see that insert is successful:
To double check, we can see that record from navigating to the public GET endpoint: http://127.0.0.1:9926/okta
Conclusion
In this tutorial, we saw how we can offload authorization to Okta and pass those scopes to HarperDB. This allows us to separate the creation of roles to a central auth management platform instead of giving direct access to the database every time a new role/user is required.
For this demo, we assumed that the token is being passed in from upstream, perhaps from an authentication layer or from another server. If you wish to also authenticate at the Custom Function layer, you can extend this code to call Okta for authentication as well as authorization.


