


Simplifying the Process
For years I had been using MongoDB as my defacto database of choice. After discovering HarperDB and moving many of my projects to HarperDB, I needed a way of importing my old historical data. I saw that HarperDB had a MongoDB migrator already created, however, I had many different collections to import and wanted more fine-tuned control over the process.
So I created a new migration utility and figured — what better way to power it than to use HarperDB’s Custom Functions? This lets the entire migration process stay on the HarperDB Instance and allows multiple Users to interact with the utility simultaneously. In this article, I’d like to go over how it works and how you can use it to sync any amount of data that you need over to your HarperDB Instance.
Designing the Migrator
One of the big concerns with syncing data between systems is keeping any potential duplicates from occurring. To tackle this issue, the Custom Function keeps the migration task informed of the last ObjectID it upserted, so that the tool isn’t needlessly reading and processing data that isn’t required. It also performs an upsert using a unique key so that even if data is read twice, only one record will exist in the target table for that row.
By default, it will send chunks of 5000 records at a time to the ingestion endpoint and subsequently save them into the database. This is configurable via the configuration file in the task itself. If an error occurs, it will skip the collection and try again later.
To read the data from the MongoDB source, a MongoDB Connection URI is requested from the User. This URI is encrypted at rest in the database and isn’t returned in any responses for security purposes. It’s only decrypted whenever the task starts so that it can connect as needed. This is also the easiest way to handle authentication since we can pass credentials in this connection string as well.
If you need a more robust solution, the code is very extendable and could be modified easily both on the server side and on the task.
Using the Migrator
To use the migrator, you’ll first need to install it on your HarperDB Instance. You can grab it from the GitHub Repo and install it like so:
While it is optional, you’ll want to generate a unique hash key used to encrypt the Mongo URI at rest:
Edit line 13, replacing the default hash with your own, or provide it via an environment variable (recommended):
With this completed, you can go to HarperDB Studio, restart the Custom Functions service, and then access the tool at /mongo-migrator/static on your instance’s Custom Functions port. For example: http://localhost:9926/mongo-migrator/static.
Performing a Migration
To create your first migration, click the ‘Create a New Migration Job’ button on the homepage of the utility. The first step is to enter the Mongo Connection URI:

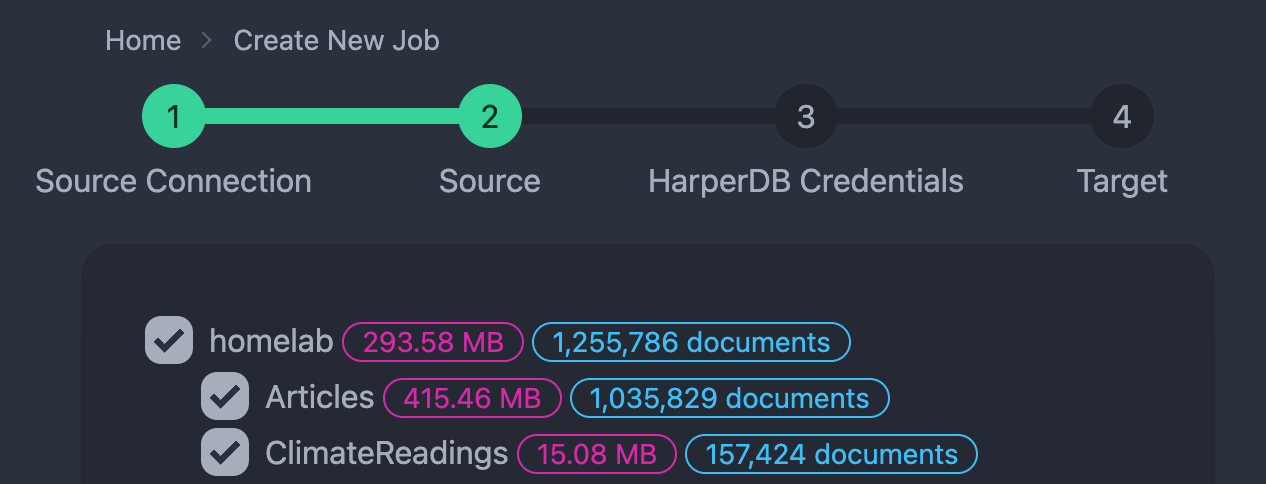
For example, here I’m entering the URL to my local home-lab server, but you could connect to any database that your HarperDB Instance has network access to. Once connected, a list of all databases and collections will be enumerated from the remote MongoDB server. You can then select any of the listed collections for migration:
After selecting your desired collections to migrate, the next step is to provide the HarperDB credentials used for enumerating the HarperDB schemas and tables:

The final step is to pick where you would like the data to be migrated to on your local HarperDB Instance. You can pick from pre-created schemas and tables, or create them on the fly as you need as well:

Once you finish the setup, you’ll be automatically redirected to the ‘Job Detail’ page, where you’ll get all of the latest information about the migration job and any logs. You can also start or stop the migration job at any time as well:

Once the tool runs out of records to transfer, it’ll wait 30 seconds and check again for any new rows to migrate, and repeat the process. This is a good way to keep the database up to date while you switch it completely to HarperDB.
Conclusion
I’ve had the chance to migrate my data using this tool and hopefully, it comes in handy for you too. It’s also proven to be very reliable and is written completely in NodeJS so it’s very straightforward to modify and extend further if you need it.
This tool was much easier to write since I can depend on HarperDB’s Custom Functions to power it. The built-in API also makes it really easy to interact with the data and perform all the checks that are required for this kind of tool.
Resources